-
스프링 데이터 - 3 (스프링 부트 활용 - 9)Programming/Spring Boot 2020. 3. 13. 00:40728x90
NoSQL
1. Redis
Key-Value로 데이터를 저장
- 스프링 데이터 Redis
StringRedisTemplate, RedisTemplate
extends CrudRepository
1) 도커로 Redis 설치 및 실행
docker run -p 6379:6379 --name redis_boot -d redis
docker exec -i -t redis_boot redis-cli
2) 의존성 추가
3) Account 작성
@RedisHash("accounts")
public class Account {

    @Id
    private String id;

    private String username;

    private String email;

    public String getId() {
        return id;
    }

    public void setId(String id) {
        this.id = id;
    }

    public String getUsername() {
        return username;
    }

    public void setUsername(String username) {
        this.username = username;
    }

    public String getEmail() {
        return email;
    }

    public void setEmail(String email) {
        this.email = email;
    }
}
4) Repository 작성
public interface AccountRepository extends CrudRepository<Account, String> {
}
5) Runner 작성
@Component
public class RedisRunner implements ApplicationRunner {

    @Autowired
    StringRedisTemplate redisTemplate;

    @Autowired
    AccountRepository repository;

    @Override
    public void run(ApplicationArguments args) throws Exception {
        final ValueOperations<String, String> values = redisTemplate.opsForValue();
        values.set("hongchan", "jiyun");
        values.set("hello", "world");
        values.set("spring boot", "2.0");

        Account account = new Account();
        account.setUsername("hongchan");
        account.setEmail("hongchan@naver.com");

        repository.save(account);
        final Optional<Account> byId = repository.findById(account.getId());

        System.out.println(byId.get().getUsername());
        System.out.println(byId.get().getEmail());
    }
}
6379 포트를 사용했기 때문에 아무런 설정 없이 사용가능 했음
다른 포트를 사용했거나, localhost가 아니었다면 설정 변경 필요
- Redis 주요 커멘드
keys *
get {key}
hget {key} {col}
hgetall {key}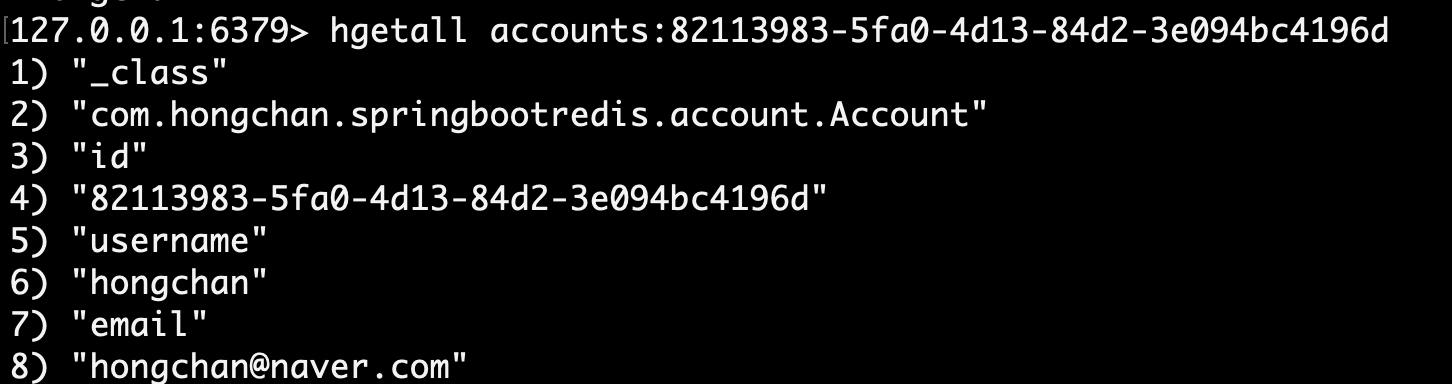
실행 결과 2. MongoDB
JSON 기반의 도큐먼트 데이터베이스로 스키마가 없는 것이 특징
1) 도커로 mongoDB 설치 및 실행
docker run -p 27017:27017 --name mongo_boot -d mongo
docker exec -i -t mongo_boot mongo
2) 의존성 추가
3) Account 작성
@Document(collection = "accounts")
public class Account {

    @Id
    private String id;

    private String username;

    private String email;

    public String getId() {
        return id;
    }

    public void setId(String id) {
        this.id = id;
    }

    public String getUsername() {
        return username;
    }

    public void setUsername(String username) {
        this.username = username;
    }

    public String getEmail() {
        return email;
    }

    public void setEmail(String email) {
        this.email = email;
    }
}
4) Runner 작성
기존과는 다르게 Application에 작성
MongoTemplate 의 insert를 써도 되고, AccountRepository를 만들어서 insert를 해도 됨
@SpringBootApplication
public class SpringbootmongoApplication {

    @Autowired
    MongoTemplate mongoTemplate;

    public static void main(String[] args) {
        SpringApplication.run(SpringbootmongoApplication.class, args);
    }

    @Bean
    public ApplicationRunner applicationRunner() {
        return args -> {
            Account account = new Account();
            account.setUsername("hongchan");
            account.setEmail("hongchan@naver.com");

            mongoTemplate.insert(account);
            System.out.println("Finished");
        };
    }

}
- MongoDB 주요 커멘드
db
use {db name}
db.{collection name}.find({})
실행 결과 - 내장형 MongoDB 존재함, 테스트 용도로 사용하기 적합
3. Neo4j
노드 간의 연관 관계를 영속화하는데 유리한 그래프 데이터베이스
예) 어떤 친구의 친구의 친구를 찾는 질의문 작성에 유리
1) 도커로 Neo4j 설치 및 실행
두 개의 포트를 지정 (하나는 웹으로 데이터들을 확인하기 위함)
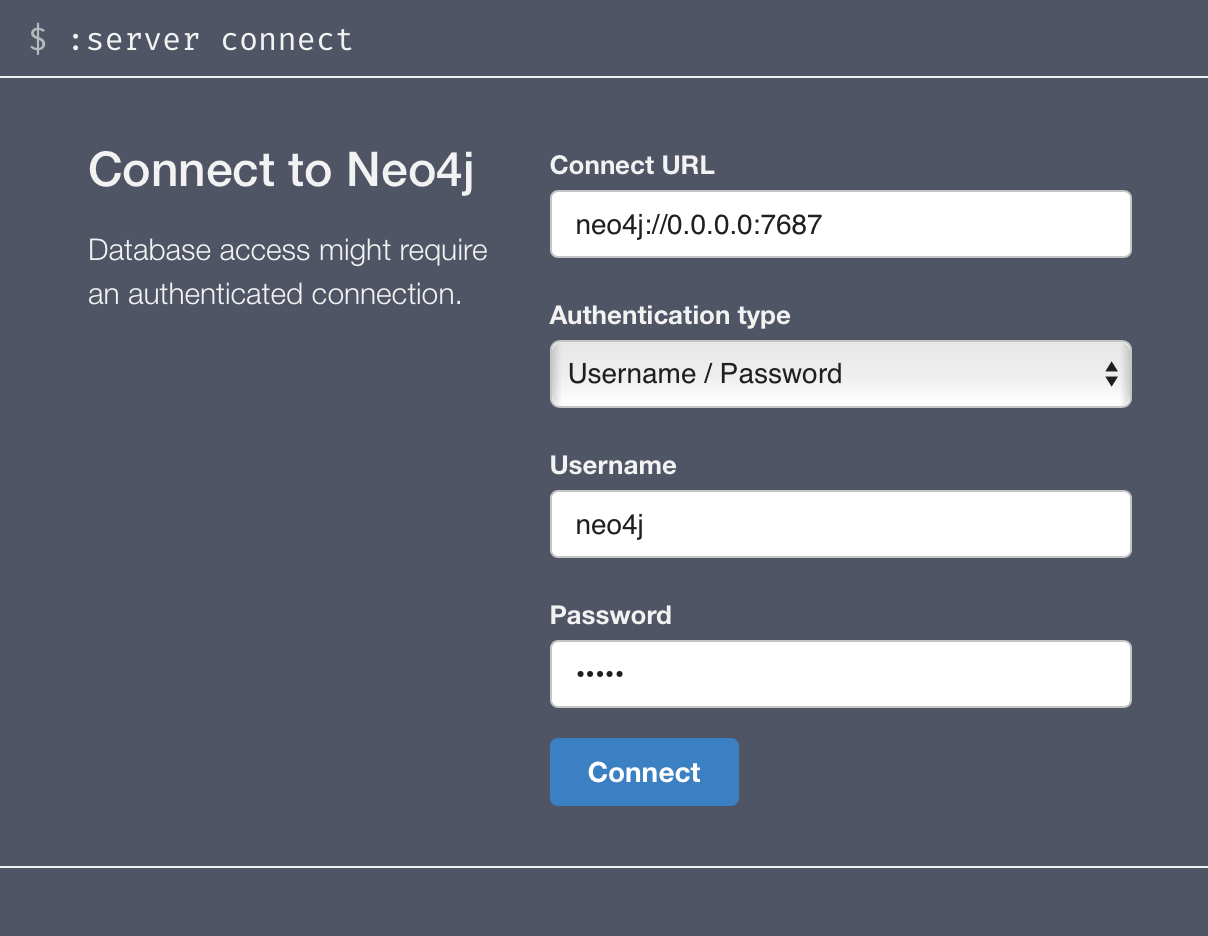
docker run -p 7474:7474 -p 7687:7687 -d --name noe4j_boot neo4j2) http://localhost:7474 로 접속
초기 비밀번호는 neo4j -> 접속하면 바로 변경해야 함
2-1) 비밀번호를 변경했으므로, 프로퍼티 추가
spring.data.neo4j.password=1111
spring.data.neo4j.username=neo4j
3) 의존성 추가
4) Account 작성
@NodeEntity
public class Account {

    @Id @GeneratedValue
    private Long id;

    private String username;

    private String email;

    @Relationship(type = "has")
    private Set<Role> roles = new HashSet<>();

    public Set<Role> getRoles() {
        return roles;
    }

    public void setRoles(Set<Role> roles) {
        this.roles = roles;
    }

    public Long getId() {
        return id;
    }

    public void setId(Long id) {
        this.id = id;
    }

    public String getUsername() {
        return username;
    }

    public void setUsername(String username) {
        this.username = username;
    }

    public String getEmail() {
        return email;
    }

    public void setEmail(String email) {
        this.email = email;
    }
}
5) Role 작성
@NodeEntity
public class Role {

    @Id @GeneratedValue
    private Long id;

    private String name;

    public Long getId() {
        return id;
    }

    public void setId(Long id) {
        this.id = id;
    }

    public String getName() {
        return name;
    }

    public void setName(String name) {
        this.name = name;
    }
}
6) Runner 작성
@Component
public class Neo4jRunner implements ApplicationRunner {

    @Autowired
    SessionFactory sessionFactory;

    @Override
    public void run(ApplicationArguments args) throws Exception {
        Account account = new Account();
        account.setUsername("jiyun");
        account.setEmail("ji@naver.com");

        Role role = new Role();
        role.setName("hongchan");
        account.getRoles().add(role);

        final Session session = sessionFactory.openSession();
        session.save(account);
        sessionFactory.close();

        System.out.println("Finished");
    }
}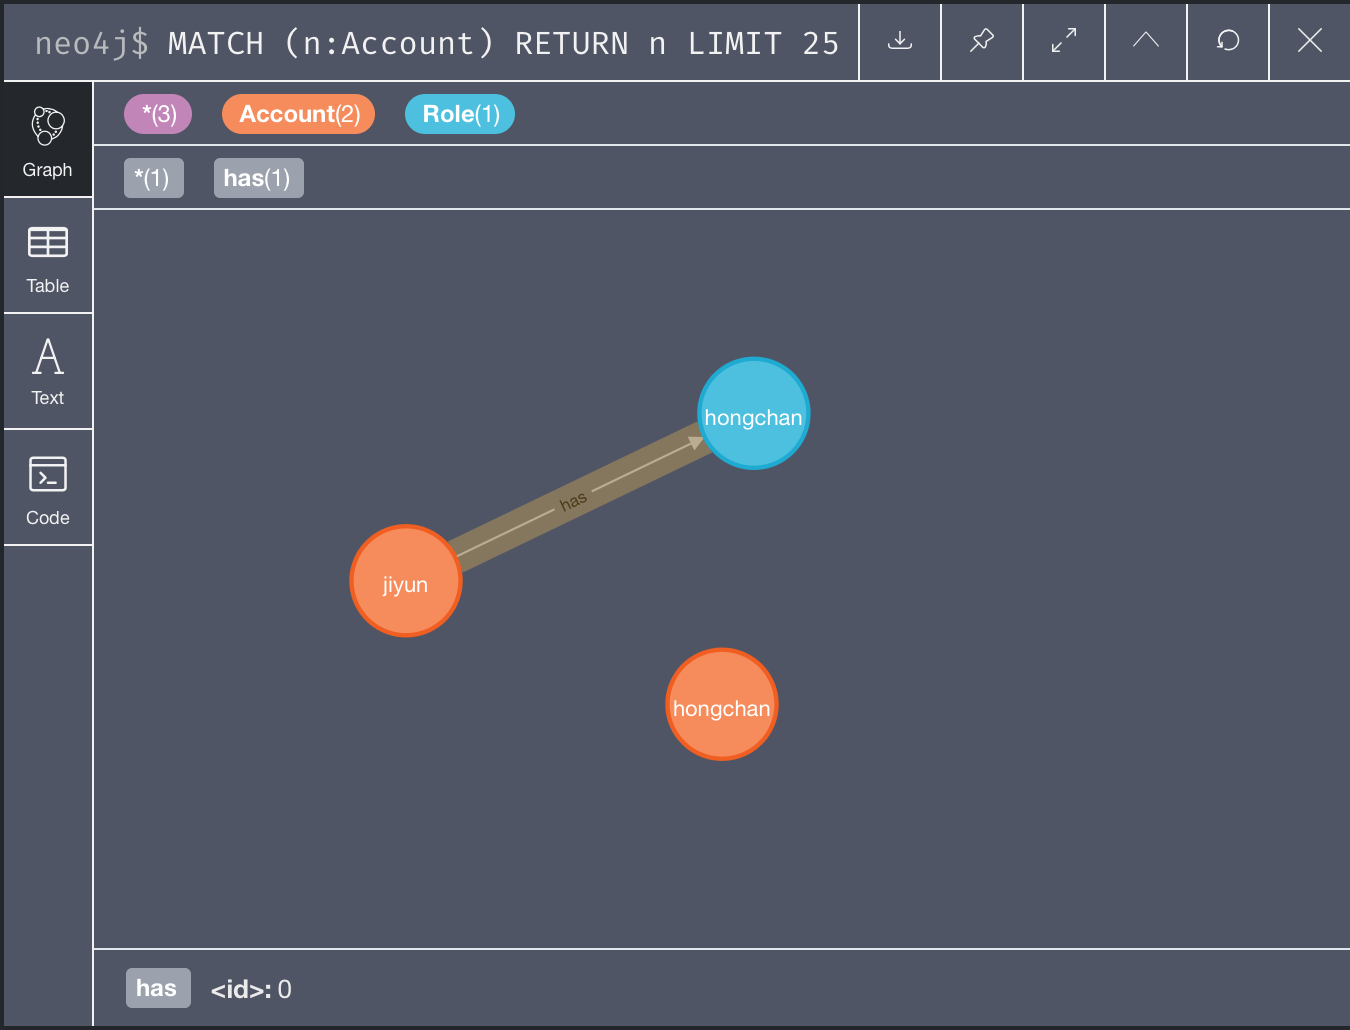
localhost로 접속해 결과 확인 인프런 백기선님 '스프링 부트’ 강의를 듣고 정리한 내용입니다.
728x90'Programming > Spring Boot' 카테고리의 다른 글
스프링 REST 클라이언트 (스프링 부트 활용 - 11) (0) 2020.03.13 스프링 시큐리티 (스프링 부트 활용 - 10) (0) 2020.03.13 스프링 데이터 - 2 (스프링 부트 활용 - 8) (0) 2020.03.12 스프링 데이터 - 1 (스프링 부트 활용 - 7) (0) 2020.03.11 스프링 웹 MVC - 2 (스프링 부트 활용 - 6) (0) 2020.03.10